Before I even start I'm going to be upfront and tell you that this is not the right way to use watercolours. I have no idea how to use watercolours the right way. I have no interest in learning. I taught myself to use watercolours from an article in an old folk art magazine I found when I was about fourteen (At that point I actually made my own paints by grating watercolour pencils because my mum wouldn't let me buy paints.) and it was about ten years before I discovered it wasn't proper and nobody else seems to do it this way. But that's the thing with art. It doesn't matter if you're doing it the right way. It only matters if you like the result.
What you need:-
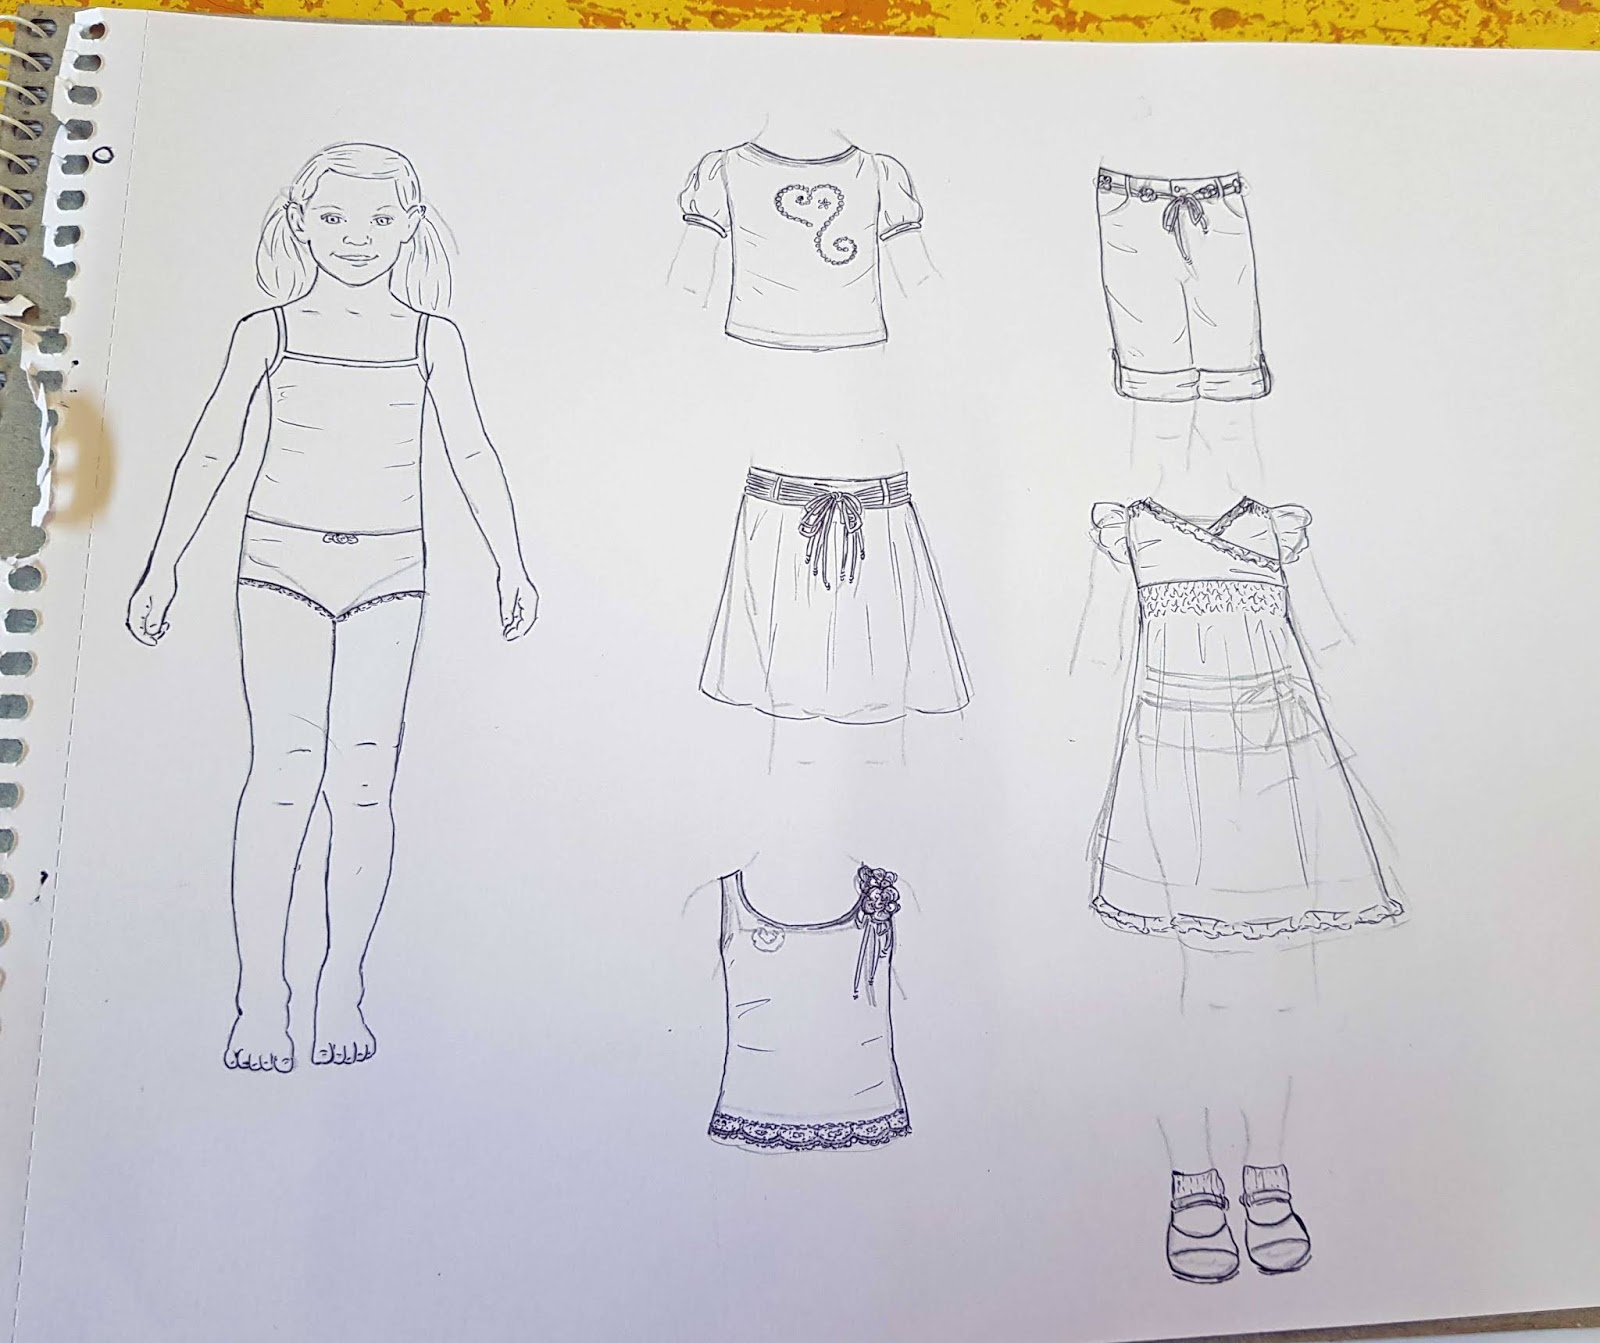
- Dolls to paint.
- A plastic container with a lid.
- The cheapest, nastiest paper towels you can find.
- A cup or jar for paint water.
- Tubes of watercolour paint.
- Paintbrushes.
If you don't want to draw your own dolls here's some you can print out and colour. Just don't print them on ordinary printer paper if you're going to paint them. Use a drawing paper that can take being wet and won't bleed or feather when painted on.

As in my previous post, you don't need to spend a lot of money on materials. It's important that you use cheap paper towel. Expensive ones have a varnishy type of coating that gets into the paint and makes it gummy and gross. Any flat-bottomed plastic container with a tight fitting lid will do, but if it's rectangular and roughly the size of a sheet of paper towel, that's ideal. Your water cup should look as different to your coffee cup as possible but other than that it doesn't matter. An old mustard jar is fantastic.
Your paints don't need to be fancy. A basic student box of watercolour tubes is fine. I would suggest that if they're under ten dollars a box, they're probably not good enough but anything between about fifteen and forty dollars a box is good. I actually don't like expensive paints. I find they don't dilute as consistently or easily as cheaper paints. At the moment my favourite brand is Mont marte, which is an Australian brand that you can get in two dollar shops here. They're available worldwide though. Reeves are also good. I've also got a lot that are a brand called Maries but I don't think you can get them anymore. The Derwent Academy boxes should be good, but I haven't tried them personally. There's another brand in Australian two dollar shops called Reno Art. I do not recommend wasting your money on them. I have never bought a product by Reno that I've been happy with.
Here's my confused paintbox (It's not usually this neat. This was taken just after I'd bought the box from Aldi and shoveled in my paints.)

And my favourite case of Mont marte paints! (Which needs replacing because it was put away for years and years and some of the tubes split)

But you don't need heaps of colours. A basic twelve pack will provide the basics and you can mix the rest. I have heaps of colours because I used to buy a whole new box every time I ran out of white. (Until I realised it was cheaper to buy a single tube of Artist Spectrum white than a whole new box of paints.)
As for brushes, obviously you need something better than those kiddy brushes with the plastic bristles. I don't like pig bristle brushes for watercolour - too scratchy. And I find the little squirrel hair ones to be messy and uncontrolled. I like brushes with Taklon bristles. Before you ask, I have no idea what Taklon is. But it says Taklon on the pack. They're smooth and hold paint well. Montmarte sell nice packs of Taklon brushes packaged as being for Acrylic paint. (Their packs of Watercolour brushes are squirrel hair. Yucky.) I like to have one big brush about as thick as the barrel as a ball point pen, one tiny brush for detail work and one or two that are in between the others in size.
It can also be helpful to have a cloth, or tissue, or bit of toilet paper or something to wipe your brush on occasionally. (Because you should never put your paintbrush in your mouth. Especially if you're using Artist Spectrum Zinc White which tastes disgusting and the taste sticks with you for weeks.) If you're using tissue or toilet paper, obviously don't use one that's impregnated with scent or aloe vera or anything.
Getting Started.
Tear off enough paper towel to cover the bottom of your container when it's folded in half. Fold it in half and stick it in your container, so you have a double layer of paper towel in the bottom of your container. Go to the sink and run about a half inch of water into your container. Pour most of it down the sink, or into your water cup. Press on your paper towel to squeeze some of the water out, but not all of it. You want it wet, wetter than damp but not sopping.
Find somewhere to paint. Obviously you need a flat surface with room to put everything but light is the important thing. If you're painting somewhere too dark or where the electric light is too yellow or blue, you might find that the colours don't look right later.
Painting your doll.
We'll start with painting the doll. I do my skin shading with Burnt Sienna. Most basic paint kits have a colour called Burnt Sienna, if not you're looking for a sort of rust brown. Open your tube and squeeze the tiniest bit onto your paper towel. Not like you're squeezing toothpaste. Just squeeze until you can see paint and dot it onto your towel like this

Dip one of your medium sized brushes in water and use it to pick up a little paint. Don't paint it onto the doll. Paint a couple of swipes onto your wet paper towel. Squeeze as much water as you can out of your brush. Now pick up some colour from the swipes you just painted and test their colour on a scrap of paper. You want it very faint. You're painting a wash with tinted water not paint. When you have the right colour paint a layer of shading on the doll something like this

I do three layer of this. The first layer does the shadows, the second layer is exactly the same colour and goes over the first layer completely but also extends out from it. This makes the first layer darker but ther should also be more shading around the first layer now that's lighter. The third layer, I do after the first two have dried and is darker and smaller. Just touches on the darkest places. Armpits, between fingers and toes, nostrils, hollows in the ears and so on.
Once this is dry you need some crimson and yellow ochre. Mix this together to make a pinkish colour like this

The light smear next to the burnt sienna blob is the paint I used to paint the shading. Below that is my yellow ochre and crimson blobs and to the left is the pink I made. The pink smears that are there, I'll keep to paint lips and blushing later. I'll put another smear like that an inch or two away and mix with a lot of white to make my flesh tone. Like this

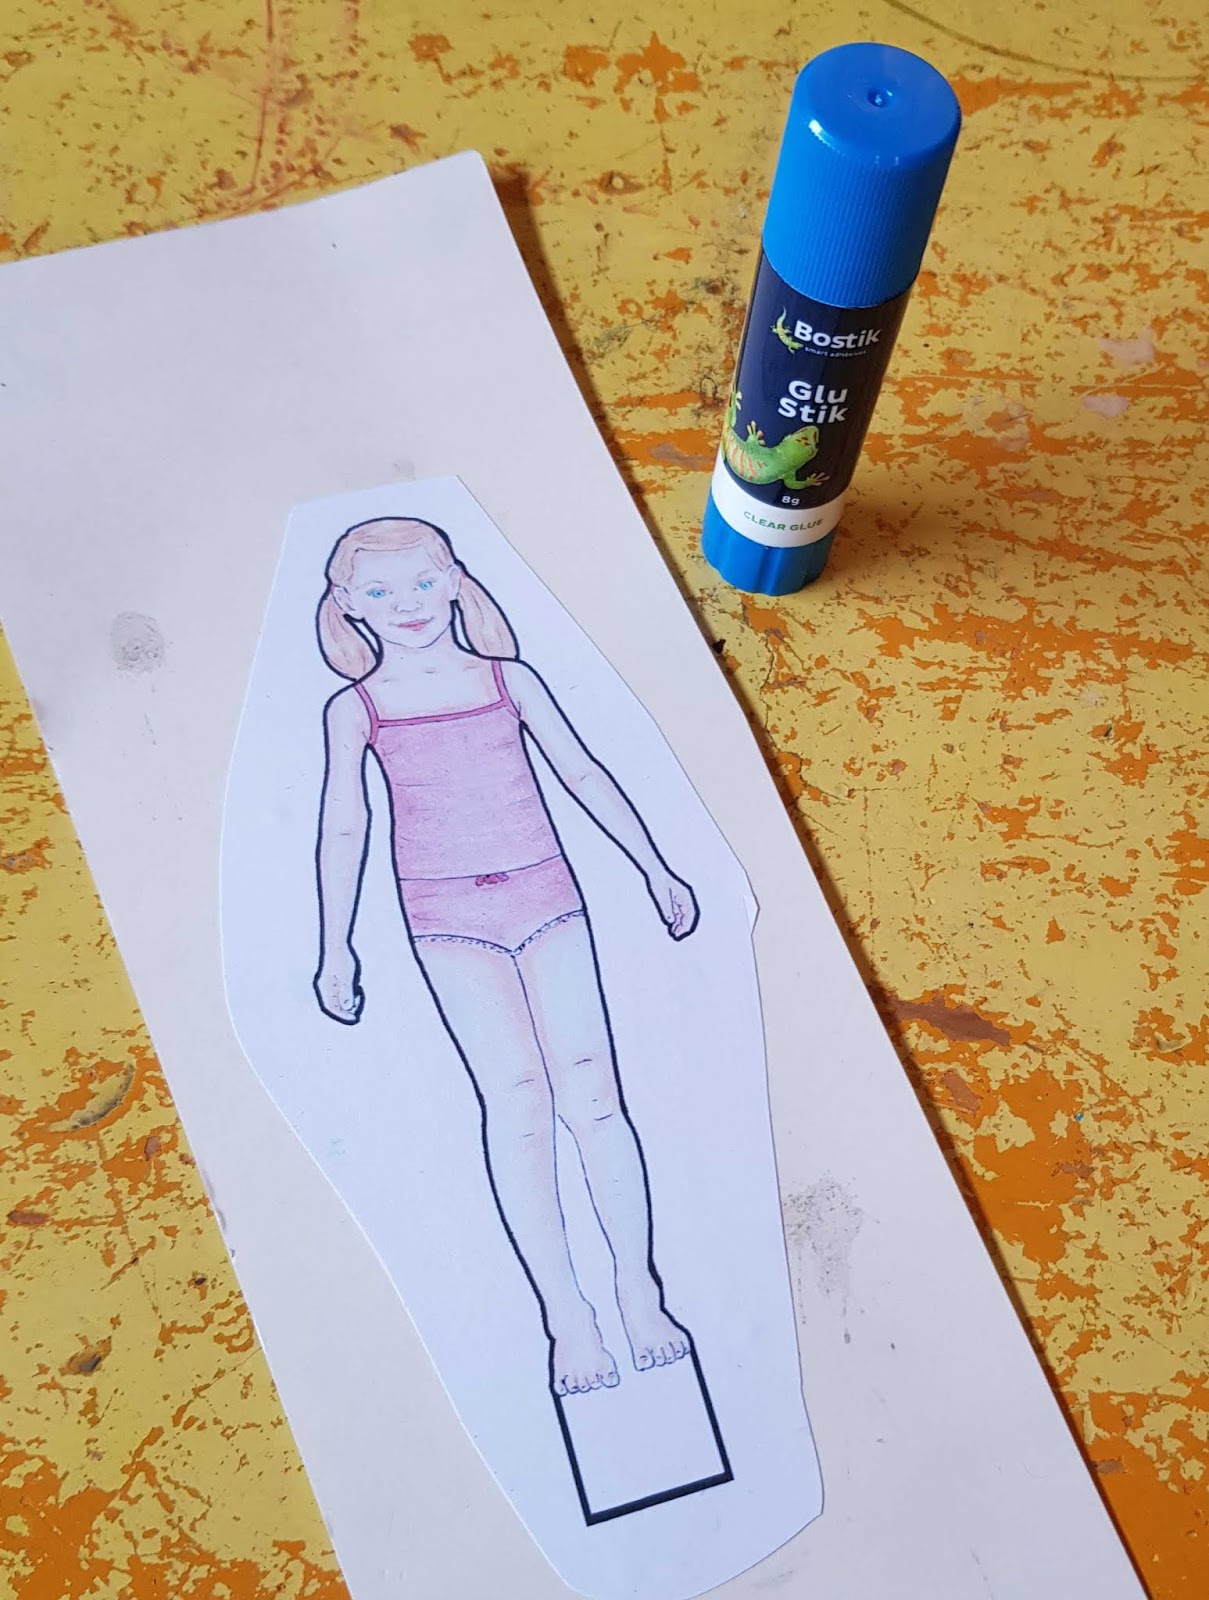
The whitish smear to the right it what I used to paint her skin. you want it very dilute and sheer or she'll look kind of corpseish - which could work if that's what you're going for. Use the biggest brush. I did two coats.

Here the paper is pilling from being too wet. If this starts happening, at any point, it's important to finish the coat you're painting as quickly as possible, let the paint dry thoroughly, then gently and lightly brush the pilling off with clean, dry hands. If you don't stop, your paper will go gross and you'll get spongey, rough, discoloured blobs. If you press too hard when you brush it off, you'll take paint off.
Once that has dry you can use the pink left over to paint the lips and tear ducts and a very dilute pink to do any blushing. And paint the eyes and hair.

This is with the hair half done. I painted the first layers of shading on her hair while I waited for her skin to dry. As with the skin you do the darker shading areas first, then the lighter shading areas but painting over the first layer as well, then I did a third layer, painting over the previous two. My first layer on her hair was burnt umber (dark brown), then burnt sienna, then yellow ochre. Once they dry I'll use a last very dilute coat of yellow ochre over all the hair.
Next you need to shade the underwear and clothes. I use burnt umber to shade warm colours and Payne's grey to shade cool colours. Most paint sets have burnt umber, it's just dark brown. Payne's grey is less common though. But if your set doesn't have it, it's just blue grey made by mixing ultramarine and black. As with the skin you do two layers of shading, maybe adding a third layer of highlights (lowlights?) if you think it needs it.

Then mix the colours you want to paint the clothes. Remember you want to paint with tinted water, not paint. You want the colours to be right when the paint is diluted, not as they're mixed. This can take a little getting used to. Once you have the right colour add another layer of shading but in that colour. Not darker. Paint over the shading extending it slightly with your final colour. This will make the bits that are white now look like highlights when you're finished.

Once that's dryish, do your final coat of colour. Don't worry too much about staying inside the lines. Everything that's outside the lines will be cut off when you're finished anyway. Then you can paint in details and belts and prints and things.

Finishing touches.
When I'm done painting, I'll often add touches like shoe buckles, buttons, sequins et cetera in silver, gold or white gel ink pen. It has to be gel ink though if you want it to work on dark colours. I bought a pack of coloured fine liners this week to try out but I'm pretty sure they won't work over anything but the lightest colours.
Computer stuff.
I've also started to outline my dolls in thick black fineliner when I draw the tabs on. This really isn't necessary at all. I do it so I can scan my dolls into my computer and rearrange the layout on photoshop to make it pretty. The thick black outline is so I can easily use the magic eraser to remove the background.

If you are going to scan and print your doll, print it on ordinary printer paper. Glossy paper often has the colour peel off if it's folded too often, and glossy paper is often too bulky when folded to work properly as clothes. But if you are going to print it on ordinary paper you need to adjust the contrast or it will print very dull and weird. Below are two prints I made of my finished doll. The left one is as she was. The right one has been run through Auto Levels in Photoshop and much more like the original.

Tips.
When painting the big coats (base colour of clothes, skin) use the biggest brush you can handle. I forgot about that and my t-shirt turned out quite scrubby because the brush I used was too small.
Obviously wait for a base layer to dry before you paint details over it. This doesn't matter as much with shading, can even help it blend. But if you're painting two separate somethings you don't want them blending or bleeding into each other.
Keep your brush as dry as possible. Squeeze the water out with your fingers, or some towel or if you're a terrible person like me, your sleeve. (I totally put mine in my mouth most of the time, but this is a horrible, awful, disgusting thing to do and you should never do it. At least not if anyone's watching.)
Just like how the right Instagram filter can disguise a terrible photo, a pretty painted pattern can hide uneven painting underneath it.
Always paint from smears on the paper towel, not directly from paint. Unless you're painting extremely fine details. Then you usually need the paint a bit thicker or it won't hold it's shape.
Build colours up from fine layers. But not too many layers or you'll ruin your paper. I think the number of layers I do is a good balance of enough detail without soaking my paper too much.
If you need to stop painting at any point, simply put the lid on the container you've got the wet paint in and stick it in the fridge. It'll be fine for at least a few days.
Ignore everything I just said and experiment and have fun and do what works for you.